
Waterproof Cooler Bag Insulation: 5 Builds Compared
Thermal insulation in a waterproof cooler bag is a system, not a foam: the foam sets the conduction path, the liner sets whether the foam stays dry, and the closure sets whether cold air stays in. Five builds dominate the category, from a single 5 mm EPE layer through to a welded TPU liner over 10 mm closed-cell foam with a reflective interlayer. Cold hours range from about 4 to 24 depending on layer count, ambient temperature and closure state, and the numbers are only comparable when the test protocol is stated. QUANZHOU JUNYUAN BAGS verifies cold retention on the sampling unit before approval. MOQ 500 pcs per style per colour, sampling 6-10 working days, bulk 35-50 days, FOB Xiamen.
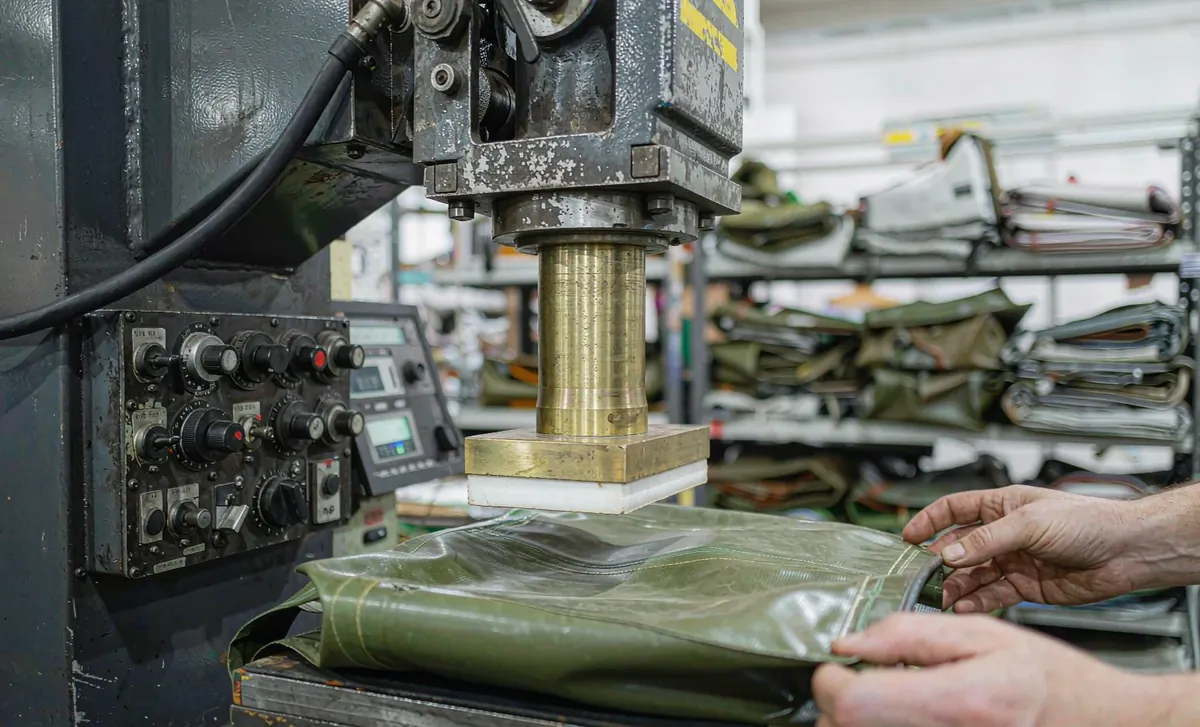
Table of Contents
- What Cold Hours Actually Measure in an Insulated Bag
- EPE Foam: Thickness, Density and Compression Set
- EVA and Closed-Cell Builds for Structured Coolers
- Foil Bubble and Reflective Laminate Layers
- Welded TPU Liner Against a Stitched PEVA Liner
- Lid, Zip and Seam: Where Cold Actually Escapes
- Cold-Hour Test Protocol Run Before Sampling Ships
- Insulation Build Table: Layer, mm and Cold Hours
- Condensation, Wicking and the Wet Cargo Failure
- Food-Contact and Odour Requirements for Cooler Liners
- Weight and Volume Penalty of Each Insulation Build
- Pairing Insulation With a Colourway Plan
- Cooler Brief Checklist Before Sampling Starts
- Frequently Asked Questions
- People Also Ask
What Cold Hours Actually Measure in an Insulated Bag
A cold hour figure is a test result, not a material property, and treating it as a material property is the reason buyers are disappointed by cooler bags that met their written specification. The number depends on the starting temperature of the load, the mass and thermal mass of the load, the ambient temperature, whether the bag is opened during the test, and how the closure was configured. Change any one of those and the same bag produces a different number.
The comparison that matters is therefore between builds tested under one protocol, not between numbers quoted by different suppliers. A bag that holds cold for 12 hours under a generous protocol can lose to a bag rated 8 hours under a strict one. Before comparing quotes, ask for the protocol: load mass, load starting temperature, ambient temperature, whether the lid was opened, and the endpoint definition.
The endpoint definition is the part most often skipped. Cold retention can be measured to the point the load reaches a food safety threshold, to the point the last ice melts, or to a stated temperature rise. Those three endpoints can differ by half the total figure, which is why two honest suppliers can quote numbers that look irreconcilable.
There is also a difference between a bag that holds temperature and a bag that holds ice. Ice melt is a phase-change problem: the load sits at a fixed temperature while the ice lasts and then climbs quickly once it is gone. A buyer who specifies ice retention and a supplier who tests temperature rise are measuring two different products, and both will believe they met the brief.
- Ask for load mass, load starting temperature and ambient temperature with every cold hour claim.
- Ask whether the lid was opened during the test and how many times.
- Ask which endpoint was used: safety threshold, ice melt, or a stated temperature rise.
- Compare builds tested under one protocol, never numbers quoted under different ones.
EPE Foam: Thickness, Density and Compression Set
Expanded polyethylene is the default thermal insulation material for soft cooler bags because it is light, cheap, closed cell and tolerant of being crushed in transit. It is specified by thickness and by density, and both matter. Thickness sets the conduction path length; density sets how well the foam resists being compressed, and a foam that compresses stops insulating because the trapped gas is what does the work.
Compression set is the property buyers ignore and then discover. A 10 mm EPE layer that is compressed to 6 mm under a full load, day after day, does not fully recover, and after a season the bag performs like a 6 mm bag. Specifying a density that holds thickness under the expected load is usually a better investment than adding another millimetre of a softer foam.
Lamination matters as much as the foam itself. A bare EPE sheet inside a fabric shell abrades and tears; laminating it to the liner on one face and to the shell on the other turns three loose layers into one composite panel, which assembles faster, holds its shape and resists the delamination that ends the life of cheap cooler bags.
- Thickness sets conduction path; density sets resistance to compression.
- Compression set is what turns a 10 mm bag into a 6 mm bag after a season of full loads.
- Laminate the foam to the liner and the shell so three loose layers become one composite panel.
- Closed cell structure is what keeps the foam from taking on water and losing thermal value.
EVA and Closed-Cell Builds for Structured Coolers
Ethylene vinyl acetate and other closed-cell sheet materials are chosen when the cooler has to hold a shape. EPE is a soft, springy sheet; EVA and similar closed-cell materials can be moulded, thermoformed or die-cut into a semi-rigid structure that survives being stacked, sat on and packed into a vehicle without collapsing onto the contents.
The trade is weight and cost against structure. A moulded EVA shell weighs more per litre than a laminated EPE panel and costs more to tool, but it protects the load from crushing and it gives the bag a retail presence that a soft bag cannot match. For a product positioned against hard coolers, that structure is the whole argument.
Structured builds also change how the closure works. A semi-rigid body holds a lid flat, which means a zip track stays aligned and seals evenly, whereas a soft body lets the lid bow and opens a gap at the corners. That mechanical advantage is worth more than a couple of millimetres of extra foam in most designs.
- Choose EVA where the bag must hold shape under stacking and sitting loads.
- Accept the weight and tooling cost as the price of a retail presence soft bags cannot match.
- A rigid body keeps a zip track aligned, which is worth more than extra foam thickness.
- Thermoformed corners remove the folded-corner leak path that soft builds carry.
Foil Bubble and Reflective Laminate Layers
Reflective laminates address radiation rather than conduction, which is why their real-world contribution is smaller than marketing suggests and larger than nothing. A foil face reduces radiant heat gain across an air gap, and it does most of its work when the bag sits in direct sun rather than in a shaded room.
Foil bubble laminate, a metallised film bonded over a bubble sheet, combines a modest air gap with a reflective face and is the cheapest way to add measurable performance to a light bag. It is also the layer most vulnerable to damage: a puncture or a creased seal collapses the bubbles locally and that spot stops contributing.
The honest way to specify a reflective layer is as a conditional benefit. Test the build with and without it, in sun and in shade, and quote the sunny result separately if that is the use case. A buyer selling a beach cooler is buying solar performance and should pay for the foil; a buyer selling a lunch cooler carried in an air-conditioned office is not.
- Reflective layers cut radiant gain, which matters most in direct sun and least in shade.
- Foil bubble adds a modest air gap cheaply but is vulnerable to puncture and creasing.
- Test with and without the layer and quote the two results separately.
- Specify the film gauge and the bond, because a delaminated foil face contributes nothing.
Welded TPU Liner Against a Stitched PEVA Liner
The liner is the most consequential decision in a cooler bag and the one most often made on price. A stitched PEVA liner is cheap and widely available, and it leaks in slow motion: every needle hole is a path for melt water to reach the foam, and once the foam holds water the bag gains weight, loses thermal value and starts to smell.
A welded thermoplastic polyurethane liner removes the needle holes entirely. The seam is a fused joint rather than a perforated one, so melt water stays in the cargo area where it can be poured out. The liner is also tougher against puncture from ice edges and from the corners of frozen packs, which is where thin PEVA fails first.
The cost is real: TPU film costs more than PEVA and welding requires the right coating chemistry and a fixture. Against that, the welded liner removes the single largest source of cooler bag complaints in service. For any product sold on a repeat-purchase basis, the welded liner pays for itself in avoided returns.
- Stitched PEVA wicks melt water into the foam through needle holes; the foam then holds water and odour.
- Welded TPU removes needle holes and resists puncture from ice edges and frozen pack corners.
- Welded liners need the right coating chemistry and a fixture, which is why they cost more.
- For repeat-purchase products the welded liner pays back in avoided returns.
Lid, Zip and Seam: Where Cold Actually Escapes
Ask a cooler bag owner where the cold goes and they will say through the walls. Measure it and the answer is usually the closure. A lid that bows, a zip that runs out of alignment at a corner, or a seam that was folded rather than welded will move more energy in an hour than the whole wall area moves in a day.
Zip selection is the specific lever. A standard coil zip with a fabric tape lets air move along the tape; a water resistant zip with a coated tape reduces that; a sealing zip with a gasketed profile reduces it further. On a cooler, the zip is also the part that ices up, so the puller and the track have to work when the bag has been frozen overnight, which is a low-temperature flexibility test rather than a water test.
Seam geometry at the corners is the second lever. A folded corner creates a small but continuous gap along the fold, and on a soft bag under load that gap widens. Welded corners, or a corner that is reinforced and taped on the inside rather than folded on the outside, close that path.
- The closure, not the wall, is usually where cold escapes first.
- Zip tape type and gasket profile matter more on a cooler than the wall thickness does.
- Test the zip after a freeze cycle, because icing is a low-temperature flexibility problem.
- Folded corners open under load; welded or internally taped corners do not.
Cold-Hour Test Protocol Run Before Sampling Ships
This is the protocol we run on a cooler sample before it leaves for approval. It exists because a cold hour figure means nothing without the conditions attached, and because running it at sampling stage costs a few days while discovering a shortfall after bulk costs a season.
- Condition the empty bag and the load at the stated ambient temperature for a minimum of four hours.
- Load a defined mass of chilled medium at a stated starting temperature, distributed across the base.
- Close the bag in the configuration named on the hangtag, including the fold count or zip state.
- Log internal temperature at a fixed interval in a chamber held at the stated ambient.
- Repeat once with the lid opened on a defined schedule to simulate real use.
- Record the time to the agreed endpoint and issue the result with all conditions stated.
Two conditions must be fixed before the run starts, or the result cannot be reproduced: the endpoint temperature and the ambient. We issue both on the report, so a buyer can compare our figure against a competitor's and know whether the comparison is valid rather than merely convenient.
Water performance is verified separately on the same sample. The outer shell is checked by hydrostatic head to ISO 811 and the liner seam by a leak check, because a cooler whose shell lets water in will wet its own foam and lose thermal value whatever the foam thickness was.
Insulation Build Table: Layer, mm and Cold Hours
Five builds cover most of the category. The cold hour column is measured under the protocol above at a stated ambient, with the lid closed, and it should be read as a comparison between these builds rather than as an absolute guarantee.
| Build | Layer stack | Total insulation mm | Cold hours to endpoint | Best use case |
|---|---|---|---|---|
| Build 1 | 5 mm EPE, PEVA liner | 5 mm | 4 to 6 hours | Lunch and daily carry |
| Build 2 | 8 mm EPE, welded liner | 8 mm | 8 to 12 hours | Day trip and picnic |
| Build 3 | 10 mm EPE plus foil face | 10 mm plus film | 12 to 18 hours | Beach and sun exposure |
| Build 4 | 10 mm closed cell, welded TPU liner | 10 mm | 14 to 20 hours | Delivery and catering |
| Build 5 | Moulded EVA shell plus reflective interlayer | 12 to 15 mm | 18 to 24 hours | Multi-day and stacking |
The pattern worth noticing is that the liner and the closure move the number more than the thickness does. Build 2 outperforms Build 3 in shaded use despite being thinner, because the welded liner keeps the foam dry. Thickness is the easiest thing to sell and the least efficient thing to buy.
Condensation, Wicking and the Wet Cargo Failure
The wet cargo failure is specific to coolers and it is misdiagnosed constantly. An owner opens the bag, finds water inside, and reports a leak. In most cases the water is condensation from warm humid air entering the bag, or melt water that was always there, and the bag is performing exactly as designed.
Wicking is the genuine version of the same complaint. Where a stitched liner meets a stitched shell, the thread acts as a wick and draws melt water sideways into the wall, out of sight and out of reach. The bag feels damp on the outside, the foam holds water, and no amount of drying the interior fixes it because the water is in the wall.
The countermeasures are a welded liner, a drain provision at the lowest interior point, and documentation that tells the owner where water comes from. The third one costs nothing and removes most of the complaints, because an owner who expects condensation does not report it as a defect.
- Condensation from humid air is not a leak and should be documented as expected behaviour.
- Thread in a stitched liner wicks melt water sideways into the wall where it cannot be dried.
- A welded liner plus a drain provision at the lowest point removes the genuine version of the failure.
- State where interior water comes from in the insert card and the complaint rate drops.
Food-Contact and Odour Requirements for Cooler Liners
A cooler liner is a food-contact surface in most jurisdictions, which makes the material declaration part of the specification rather than an afterthought. The buyer needs a declaration appropriate to the destination market, and the liner material has to be one that can carry it.
Odour is the second requirement and the one that generates reviews. A liner that smells of plastic on arrival is read as contaminated even when it is safe, and the smell usually comes from the adhesive or the film rather than from the foam. Specifying a low-odour film and a low-odour bond, and verifying by a simple sensory check on the sampling unit, prevents a review problem that no test standard will catch for you.
Cleanability closes the set. The liner has to wipe clean with a sanitiser without softening or crazing, because a cooler that cannot be cleaned becomes a cooler that is replaced. Where the destination market requires it, REACH and RoHS declarations cover the substances position, and SGS documentation supports the file.
- Obtain a food-contact declaration appropriate to the destination market for the liner material.
- Specify low-odour film and low-odour adhesive; check the sampling unit by smell.
- Verify the liner survives repeated sanitiser wiping without softening or crazing.
- Hold REACH and RoHS declarations where the destination requires them.
Weight and Volume Penalty of Each Insulation Build
Insulation consumes interior volume, and buyers consistently underestimate how much. Every millimetre of wall thickness is taken from the inside of a fixed exterior, so a bag that looks the same size on the shelf can hold meaningfully less. That is the penalty that matters most in a capacity-led category.
Weight is the second penalty and it interacts with the rated capacity. A heavily insulated bag is heavier empty, which matters if the product is carried any distance, and it is heavier again once the foam has taken on water through a compromised liner. The dry weight figure on the sheet should therefore be quoted with the liner type named.
The practical resolution is to set the exterior from the use case and the interior from the load. Decide what has to fit, add the wall thickness, and let the exterior be the result rather than starting from a round exterior number and discovering the load does not fit.
Shipping volume is a related cost that buyers meet at the freight quote rather than at the design stage. Insulated bags do not compress, so a container that would hold a large number of flat dry bags holds far fewer coolers, and the landed cost per unit rises accordingly. Ask for the packed carton dimension at quotation, not after the production slot is booked.
- Wall thickness is taken from interior volume; a thicker wall means less cargo for the same exterior.
- Quote dry weight with the liner type named, because a compromised liner adds water weight.
- Design from the load outward rather than from a round exterior capacity number.
- State interior and exterior dimensions separately on the specification sheet.
Pairing Insulation With a Colourway Plan
Insulation complicates the colourway plan because the liner and the shell are usually different materials sourced separately, and each colourway books both. The minimum is 500 pcs per style per colour, and a three-colourway cooler programme is therefore three shell bookings and three liner bookings that have to be coordinated.
One simplifying move is to hold the liner constant across colourways. A single liner colour kept across all shell variants reduces the number of material lines, reduces the approval work, and removes a class of mismatch. Where the brand wants a coloured liner, the practical limit is usually two before the bookings get expensive.
The other move is to plan the insulation build once and vary only the shell. Because the cold hour result follows the build rather than the colour, a tested build can carry across colourways without repeating the thermal test, which shortens qualification of the second and third colour to a colour approval alone.
The full range of insulated builds we run is shown on the cooler bag programme page, and the shell ratings they pair with are summarised under waterproof ratings.
Cooler Brief Checklist Before Sampling Starts
A cooler brief needs two things a dry bag brief does not: a thermal target and a food-contact position. Send both with the first email and the sampling round stays inside 6-10 working days instead of stretching over a second round of questions.
- Cold hour target, with the load mass, ambient temperature and endpoint you expect it to be measured to.
- Insulation build preference, or the use case if you want us to propose one.
- Liner preference: welded TPU or stitched PEVA, and the food-contact market.
- Closure type and whether the bag will be frozen with the zip closed.
- Interior volume required, not exterior, so the wall thickness is accounted for.
- Sanitiser and cleaning chemistry the liner will meet in service.
- Colourway count and liner colour strategy, at 500 pcs per style per colour.
- Destination market and the compliance declarations required.
Send the brief to our team or to service@junyuanbags.com, or reach us on WhatsApp at +86 177 5002 0688. QUANZHOU JUNYUAN BAGS has built insulated waterproof programmes since 2014, with the founding team in the trade since 2004, and thermal verification is run on the sampling unit before it ships for approval.
Frequently Asked Questions
Q1: What insulation material is best for a soft cooler bag?
A: It depends on whether the bag needs structure. Laminated EPE foam is the default for soft coolers because it is light and cheap, while EVA and other closed-cell sheet materials are chosen where the bag must hold shape under stacking. The liner and closure usually move cold hours more than the foam thickness does.
Q2: How many cold hours should I specify for a cooler bag?
A: Set the target from the use case and then measure it under a stated protocol. Day-trip builds land around 8 to 12 hours, beach and sun builds 12 to 18, and moulded multi-day builds 18 to 24. The number is only comparable between suppliers when load mass, ambient and endpoint are identical.
Q3: Why does my cooler bag feel wet on the outside?
A: The usual cause is wicking through a stitched liner, where the thread draws melt water sideways into the wall where it cannot be dried. A welded liner removes the needle holes and a drain provision at the lowest interior point removes the standing water, which together fix most of these complaints.
Q4: Is water inside a cooler always a leak?
A: No, and this is the most misdiagnosed complaint in the category. Warm humid air entering the bag condenses on the cold interior, and melt water is always present as ice melts. Documenting both in the insert card as expected behaviour removes most reports that are not defects at all.
Q5: Does a foil layer really improve cooler performance?
A: Yes, but conditionally. A reflective face cuts radiant heat gain, which matters most when the bag sits in direct sun and least in shade. We test builds with and without the layer and quote the two results separately so a buyer pays for it only where the use case justifies it.
Q6: What is the difference between a welded TPU and a stitched PEVA liner?
A: A stitched PEVA liner has needle holes that let melt water into the foam, which then holds water, gains weight and develops odour. A welded TPU liner has a fused seam with no needle holes and resists puncture from ice edges. The welded liner costs more and removes the largest source of in-service complaints.
Q7: How much interior volume does insulation consume?
A: More than buyers expect, because every millimetre of wall thickness is taken from the inside of a fixed exterior. Design from the load outward: decide what has to fit, add the wall thickness, and let the exterior be the result rather than starting from a round exterior capacity.
Q8: What is the MOQ for a custom insulated cooler bag?
A: 500 pcs per style per colour. A three-colourway programme books three shell and three liner lots, so holding the liner colour constant across colourways is a simple way to reduce both the material lines and the approval work.
Q9: Can I reuse a cold hour test across colourways?
A: Yes, because the thermal result follows the build rather than the colour. Once one build is tested, additional colourways need a colour approval only, which shortens qualification of the second and third colour considerably and keeps sampling inside the 6-10 working day window.
Q10: How do I stop a cooler liner from smelling of plastic?
A: Specify a low-odour film and a low-odour adhesive, because the smell usually comes from the bond rather than the foam, and check the sampling unit by smell before approval. No test standard catches this for you, and an owner who smells plastic on arrival reads it as contamination.
Q11: What compliance declarations does a cooler liner need?
A: A food-contact declaration appropriate to the destination market is the starting point, and REACH and RoHS declarations cover the substances position where the destination requires them. Ask for the file at enquiry rather than at pre-shipment, because a missing declaration blocks a shipment as effectively as a failed test.
Q12: Why does the zip fail on a cooler bag?
A: Because it ices up. A cooler that is frozen overnight has to open the next morning, which is a low-temperature flexibility problem rather than a water ingress problem. Test the zip after a freeze cycle, and specify the tape type and gasket profile deliberately rather than accepting whatever is on the shelf.
Q13: Where does cold actually escape from in a cooler bag?
A: Usually the closure rather than the walls. A lid that bows, a zip that loses alignment at a corner, or a folded corner that opens under load will move more energy in an hour than the whole wall area moves in a day, which is why closure spec matters more than extra foam.
Q14: How long does sampling take for an insulated build?
A: 6-10 working days for a standard build and 12-15 for a complex one, plus the days needed for the thermal run. Running the cold hour protocol at sampling stage costs a few days; discovering a shortfall after a 35-50 day bulk run costs a season.
People Also Ask
- What is the best insulation for a cooler bag?
- How long should a cooler bag keep things cold?
- Why is my cooler bag wet inside?
- Is a welded liner better than a stitched liner?
- Does foil insulation work in cooler bags?
- How much volume does cooler insulation take?
- What food contact declaration does a cooler liner need?
- What is the MOQ for insulated cooler bags?