
Waterproof Outdoor Bags and Adventure Packs: Specs
A waterproof outdoor pack is specified by trip length rather than by capacity gaps in a range, because volume follows the trip, and a range built to fill a numeric ladder produces sizes nobody wants. Three requirements separate an adventure pack from a day bag: suspension that works when the shell is wet and heavy, a closure that survives being rolled by cold hands, and abrasion resistance at the base and hip belt rather than across the whole panel. QUANZHOU JUNYUAN BAGS specifies adventure packs by load, wear zone and closure duty rather than by litre count. This page sets out volume by trip length, where a pack wears first, what external carry costs in waterproofing, the test battery, and how to hold season two identical.
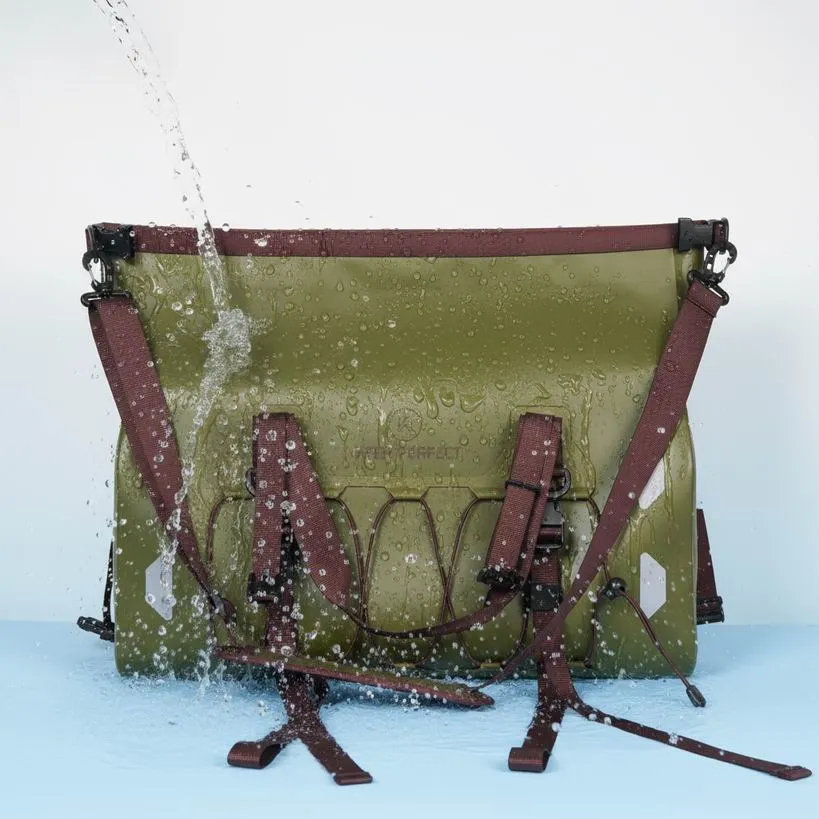
Table of Contents
- What Separates an Outdoor Pack From a Day Bag
- Choosing Volume by Trip Length, Not by Range Gaps
- Suspension and Load Transfer on a Wet Trail
- Roll-Top, Lid or Zip Collar: Three Adventure Closures
- Where an Adventure Pack Wears First
- External Carry: Straps, Loops and the Waterproof Cost
- Drinking Tube and Port Pass-Through Without a Leak Path
- A Three-Test Battery for Adventure Packs
- Where the Grams Go on an Adventure Pack Shell
- Cold, Altitude and Wet-Glove Operation
- MOQ 500 Across an Outdoor Size Family
- Colourway and Trim Planning for an Outdoor Drop
- Keeping Season Two Identical Across an Outdoor Range
- Frequently Asked Questions
- People Also Ask
What Separates an Outdoor Pack From a Day Bag
Both are bags with shoulder straps and both can be made from the same welded shell, which is why buyers are often surprised that the specifications differ so much. The difference is duty. A day bag carries a light load for a few hours on a path. An adventure pack carries a heavy load for many hours, over rough ground, in weather, and it is expected to be opened and closed by someone who is cold and tired.
That duty produces three requirements a day bag does not have. The suspension has to transfer load to the hips while the shell is wet and the contents are shifting. The closure has to seal reliably when it is operated badly, because that is how it will be operated at the end of a long day. And the shell has to resist abrasion at specific points rather than generally.
It also produces one requirement that works in the opposite direction. An adventure pack has to be repairable and serviceable in the field, because it is used far from a shop and because a customer who can fix a strap will forgive a product that a customer who cannot will return.
- Duty is the difference: heavy load, many hours, rough ground, bad weather, tired hands.
- Suspension must transfer load to the hips while the shell is wet and the load shifts.
- The closure must seal when operated badly, which is how it will be operated.
- The shell resists abrasion at specific points rather than uniformly.
- Field repairability matters, because the product is used far from a shop.
Choosing Volume by Trip Length, Not by Range Gaps
Ranges are usually built to fill a numeric ladder, and that is the wrong method here. Volume on an outdoor pack follows what a trip requires: a summit day needs enough for a shell, food, water and a small first-aid kit, and a multi-day trip needs a sleep system and a stove as well. Building sizes to fill gaps between existing numbers produces volumes that suit no trip in particular.
The practical method is to define the load first and then size the pack to it. A summit pack is sized by the volume of a shell, a litre of water, food and a kit. A weekend pack adds a sleep system. A multi-day pack adds food for the longest leg. Each of those is a defined load, and the volume follows from the load rather than from a ladder.
The second reason to work from load is that compression matters more than nominal volume. A pack that carries thirty litres well compresses to twenty when it is half full, and a pack that carries thirty litres badly does not. Specifying a compression system that works is more useful to the customer than a litre figure rounded up.
| Trip type | What the load is | Volume band that follows | Closure and access priority |
|---|---|---|---|
| Summit day | Shell, water, food, small kit | The smallest band in the range | Quick access to a shell without unpacking |
| Long day or hut trip | Adds a warm layer and more water | Lower middle band | External carry for a wet shell |
| Weekend | Adds a sleep system | Upper middle band | Wide opening for packing a bulky bag |
| Multi-day | Adds food for the longest leg | The largest band | Load transfer and a robust closure |
Suspension and Load Transfer on a Wet Trail
A welded waterproof shell does not behave like a textile shell under load. It does not stretch, it does not breathe, and it does not conform to the contents in the same way. That means a load carried inside a welded pack moves more, and it moves as a mass rather than being damped by the shell, which changes what the suspension has to do.
The requirement is to transfer load to the hips rather than to let it hang from the shoulders, and on a welded shell that is achieved by geometry rather than by fabric compliance. A hip belt with enough contact area, a back panel length matched to a torso range, and load lifters that actually pull the top of the pack toward the body are the three components that do the work.
Wet conditions add a second problem: a wet shell is slippery against a wet jacket, and a pack that stays put when dry can migrate when soaked. A back panel with some structure and a hip belt with a grippy inner face are cheap measures that prevent a pack from sliding around on a long descent.
- Size the hip belt for contact area rather than for appearance.
- Match back panel length to a stated torso range, and publish the range.
- Include load lifters that pull the top of the pack toward the body.
- Give the hip belt a grippy inner face, since a wet shell slides on a wet jacket.
- Test loaded, wet, on a slope, because that is the condition that reveals migration.
Roll-Top, Lid or Zip Collar: Three Adventure Closures
Three closures dominate adventure packs and each wins on a different axis. A roll-top is the most waterproof and the most compressible, and it is slow. A lid with a collar is the fastest to pack and the easiest to overfill, and it is the least waterproof. A zip collar sits between the two, quick to open and reasonably sealed, and it puts a mechanical part in the most loaded position on the pack.
The decision is usually made by how the pack is used. A pack that is packed once in the morning and opened twice in the day suits a roll-top, because the speed penalty is paid rarely. A pack that is opened constantly, on a climb or a photo assignment, suits a zip collar, because the speed is worth more than the marginal waterproofing.
The roll-top has one specification detail that decides whether it works in service: the stiffener. A roll-top without a stiffener can be rolled loosely and will unroll under load; one with a stiffener of the right length rolls tightly and stays rolled. Specifying the stiffener length and its stiffness is more important than specifying the number of turns, which the user will not count anyway.
| Closure | Waterproofness | Speed to open | Best suited to |
|---|---|---|---|
| Roll-top with stiffener | Highest | Slowest | Packed once, opened rarely, compressible loads |
| Zip collar | Good | Fast | Constant access, climbing and photography |
| Lid with collar | Moderate | Fastest to pack | Overfilled loads and traditional styling |
| Roll-top plus zip access panel | High, and practical | Fast for the main body | A pack needing both volume and access |
Where an Adventure Pack Wears First
Abrasion on an adventure pack is concentrated rather than general, and specifying a uniform abrasion figure across the whole shell is the most common way to overpay for one. Three zones take nearly all the wear: the base, where the pack is set down on rock and grit, the hip belt, where it rubs against clothing and against itself, and the external attach points, where straps and buckles abrade the panel they are anchored to.
The base is the one that fails first and the one easiest to engineer. A heavier gauge or a reinforced panel at the base costs a small amount of weight and removes the largest share of abrasion returns. Reinforcing only the base rather than the whole shell is the single most efficient durability decision available on this product.
The attach points are the one most often overlooked, because the wear is caused by the pack's own hardware rather than by the ground. A strap end or a buckle anchored to a panel vibrates against it for hours, and a reinforced patch under each anchor costs very little and prevents a slow abrasion that only appears after a long trip.
- The base takes the most wear and is the cheapest zone to reinforce.
- The hip belt rubs against clothing and against itself on every step.
- External attach points are abraded by the pack's own hardware for hours at a time.
- Specify abrasion by zone rather than uniformly across the shell.
- A reinforced patch under each anchor is a small cost against a slow failure.
External Carry: Straps, Loops and the Waterproof Cost
An adventure pack is expected to carry things on the outside: a wet shell, a rope, poles, an ice axe, a helmet. Every one of those features is a penetration or an attachment on a welded shell, and every one of them has a waterproofing cost that has to be paid deliberately rather than discovered.
The cost differs by feature. A daisy chain or a webbing loop anchored by welding into a seam allowance costs nothing to the envelope, because the weld is already there and the loop is welded into it. A separate D-ring or a moulded anchor bonded to a panel costs nothing either, if it is bonded rather than stitched. A stitched anchor costs everything, because it puts needle holes through the waterproof layer.
The compression straps that hold an external load are the part that usually goes wrong, because they are anchored under load and the anchor is asked to resist peel rather than shear. Anchoring into a reinforced spine or into the seam allowance, and specifying the pull direction the anchor is rated for, is what separates an anchor that holds from one that tears out with the load still attached.
| Feature | Cost to the waterproof envelope | How to build it soundly |
|---|---|---|
| Welded webbing loop in the seam allowance | None, the weld already exists | Weld the loop into the seam allowance during assembly |
| Bonded moulded anchor or D-ring | None if bonded | Bond rather than stitch, and peel-test the bond |
| Stitched anchor or patch | Puts needle holes through the layer | Avoid, or cover and tape the stitch line |
| Compression strap under load | None if anchored correctly | Anchor into a spine or seam, rated for the pull direction |
| Drainage grommet at the base | Introduces a penetration | Position above the realistic waterline and baffle it |
Drinking Tube and Port Pass-Through Without a Leak Path
A hydration system turns a sealed pack into a pack with a tube leaving it, and the tube is a leak path unless the pass-through is designed. The requirement is not complicated but it is specific: the tube has to exit through a feature that closes around it, and that feature has to be positioned so it is not the lowest point on the pack when the pack is set down.
The two workable options are a moulded port welded into the panel with a closure that grips the tube, and a routed sleeve through the seam allowance with a baffle. The first is neater and costs a component. The second costs nothing and is less convenient to thread. Both are sound; a stitched hole with a grommet pushed into it is not, because the stitch line leaks around the grommet.
The positioning rule is the one that gets ignored. A port at the base or low on a side panel will sit in water whenever the pack is set down on wet ground, and no closure around a tube is rated for continuous immersion. Placing the port high on the shoulder strap line or on the upper panel removes the exposure entirely.
- Place the port high, so it is never the lowest point when the pack is set down.
- Use a moulded port welded in, or a baffled sleeve through the seam allowance.
- Avoid a stitched hole with a pushed-in grommet, since the stitch line leaks around it.
- Specify the tube diameter the port grips, since tubes vary between systems.
- Test the pack with a tube fitted, not with the port blanked off.
A Three-Test Battery for Adventure Packs
The battery below is what we run before an adventure pack sampling round closes. It covers the three ways this product fails in service: a loaded march reveals suspension and seam problems, a rain or jet exposure reveals the closure and any penetrations, and a scuff cycle reveals whether the base and hip belt were specified properly.
| Test | Condition | Acceptance criterion | What it reveals |
|---|---|---|---|
| Loaded march | Pack loaded to its rated weight, carried for a stated distance with wet shell | No seam failure, no anchor tear-out, no suspension slip | Load transfer, anchor strength and seam behaviour under movement |
| Rain or jet exposure | Spray or jet to IEC 60529 at the stated code, with the pack loaded and the tube fitted | No moisture inside the main volume | Closure performance and every penetration |
| Scuff cycling | Abradant cycles applied to the base and hip belt zones | No breach of the waterproof layer at the stated cycles | Whether the reinforced zones were specified adequately |
Head on the material is reported separately to ISO 811, from 10,000 mm for lightweight builds to beyond 20,000 mm for heavy-duty ones, and spray behaviour is checked to AATCC 22. Both are material figures and neither is a substitute for the second step, because the closure and the penetrations decide the result on this product.
The loaded march is the step most often skipped, and it is the one that finds anchor tear-out and suspension slip. Both of those are design faults that no amount of material testing will reveal, and both only appear under movement with weight in the pack.
Where the Grams Go on an Adventure Pack Shell
Weight is the specification most argued about on an adventure pack, and it is usually argued about in the wrong place. The shell accounts for a modest share of the finished weight on a loaded pack, and reducing it produces a pack that is lighter and less durable. The suspension hardware and the reinforcement account for a larger share and reducing them produces a pack that carries badly.
The useful way to approach it is grams per litre on the empty pack, used as a comparison within a range rather than as an absolute target. A smaller pack has a worse ratio than a larger one for structural reasons, so comparing a summit pack with a multi-day pack on that ratio is meaningless. Comparing two versions of the same size is not.
The largest real saving available is usually in the reinforcement map rather than in the shell. Reinforcing the base and the attach points and leaving the side panels at a lighter gauge produces a pack that is both lighter and more durable than one built at a uniform heavy gauge, because the weight moves to where it does work.
- The shell is a modest share of finished weight; the suspension and reinforcement are larger.
- Use grams per litre to compare within a size, not between sizes.
- Reinforce by zone rather than uniformly, and put the weight where it works.
- A uniform heavy gauge is heavier and no more durable than a mapped one.
- Reducing shell gauge to hit a weight target usually costs durability in the wrong place.
Cold, Altitude and Wet-Glove Operation
An adventure pack is operated in conditions where hands are cold, gloves are on, and fine motor control is reduced. Every fastening on the product therefore has to be specified for a hand that cannot do what a warm hand does, and the specification is different from the one used on a bag opened at a desk.
Three properties decide whether a fastening works in those conditions. Size is first: a buckle or a slider that can be found and operated through a glove has to be larger than one designed for a bare hand. Grip is second: a pull with some texture works when a smooth one slips. Force is third: a fastening that needs significant force to release becomes unusable at altitude.
The shell has a cold requirement too, and it is the one that produces the most dramatic failures. A film that stiffens in the cold makes a roll-top fold difficult to form and then difficult to keep formed, which means the closure that was easy to seal at midday is the closure that fails at dusk. A cold bend requirement at a stated temperature prevents it.
| Requirement | Why it matters in the field | Specification response |
|---|---|---|
| Fastening size | Gloves reduce precision | Larger buckles and pulls than a desk product |
| Grip texture | Wet and cold surfaces slip | Textured pulls, and a cord loop where appropriate |
| Release force | Strength and dexterity drop with cold and altitude | Specify a maximum release force, not only a strength |
| Shell cold bend | A stiff shell will not form or hold a fold | State a low-temperature bend requirement |
| Hardware cold behaviour | Some polymers become brittle | Specify acetal or an equivalent, and cold-test the part |
MOQ 500 Across an Outdoor Size Family
The minimum order quantity is 500 pieces per style per colour, and on an outdoor range each size is a style. A four-size family in one colourway is therefore four commitments, and a four-size family in two colourways is eight. That arithmetic is the reason most first ranges are smaller than the brand's ambition.
The efficient first range is two sizes in one colourway, chosen to cover the trips the brand actually sells into, plus a third added in season two once the sales split is known. Sharing one shell, one hardware family and one weld parameter set across the sizes is what makes the third cheap to add, because nothing has to be re-qualified.
The alternative, and the one that suits a brand with an established audience, is one size in three colourways. That produces a range that looks like a range on a shelf and it suits a market where the customer already knows which size they want. It is the wrong choice for a first launch, where the size split is the unknown.
- Each size is a style and each colour is a separate 500 piece minimum.
- A four-size, two-colourway range is eight commitments, not one.
- Launch two sizes in one colourway, and add a third after the split is known.
- Share one shell, one hardware family and one weld parameter set.
- Colourway expansion suits a brand that already knows its size split.
Colourway and Trim Planning for an Outdoor Drop
Outdoor colourways are less seasonal than beach or fashion ranges, and that changes how they should be planned. A core earth or dark shade carries across several seasons and is the safe majority of any drop, while an accent shade is where a brand expresses itself and where the volume risk sits.
The technical constraint is that the shades which sell in this category are the ones with the best light fastness. Dark greens, greys, browns and blacks are all inorganic-pigment territory and they hold well. A bright accent in an outdoor range needs the same light fastness specification as a beach colourway, because it will spend its life on a mountain rather than under a parasol.
Trim is where a drop becomes expensive. Reflective piping, contrast webbing and a contrast zip tape each add a component with its own minimum and its own lead time. Specifying trim as a shared component across the whole family, rather than a bespoke item per colourway, is usually the difference between a range that books on time and one that waits on a tape.
- Weight the core dark or earth shade and keep accents lighter in volume.
- Specify light fastness on bright accents, since outdoor exposure is severe.
- Share trim components across the family rather than bespoke per colourway.
- Approve shade under defined lighting and keep the swatch with the product file.
- Lock colourway before the material booking, because shade drives the calendar.
Keeping Season Two Identical Across an Outdoor Range
The most common complaint from an established outdoor brand is not about season one. It is that season two is slightly different: the shade is a touch off, the shell feels firmer, the closure needs a different number of turns. None of those are defects and all of them are returns, because the customer is buying the same product they already own.
The causes are ordinary and preventable. A material is substituted because the original roll was unavailable. A weld parameter is adjusted because a different operator set the machine. A closure is sourced from a different supplier because the price moved. Each change is individually defensible and collectively they produce a different product.
The controls are cheap. Retain a sealed reference sample from the approved lot and compare every repeat against it rather than against a description. Record the weld parameters as part of the product file rather than as a machine setting. Re-run the ingress test whenever the closure or the film changes, and re-approve shade against the original swatch rather than against the previous production run.
| Drift observed in season two | Usual cause | Control that prevents it |
|---|---|---|
| Shade a touch off | A substitute roll, or approval against the previous run | Approve against the original retained swatch, not the last lot |
| Shell feels firmer | A different gauge or coating lot | Retain a sealed reference sample and compare by hand |
| Closure needs different turns | A closure sourced from a different supplier | Specify the closure supplier and re-test on any change |
| Weld line looks different | Parameters re-set by a different operator | Record parameters in the product file, not on the machine |
| Sizing slightly different | A pattern revision nobody recorded | Version-control the pattern and require sign-off on any revision |
QUANZHOU JUNYUAN BAGS was established in 2014, with our founder in the bag trade since 2004, and adventure programmes are specified by load, wear zone and closure duty rather than by litre count. Head is reported to ISO 811 from 10,000 mm for lightweight builds to beyond 20,000 mm for heavy-duty ones, ingress is tested to IEC 60529 with the method and duration recorded, spray behaviour is checked to AATCC 22, and lot acceptance is recorded to AQL 2.5 under ISO 2859-1. Capacity at our validated production partner facility is verified by SGS at 4,950 square metres, 7 production lines, 149 pieces of equipment, 137 staff and 200,000 pieces per month, with market documentation able to cover CE, CPC, RoHS and REACH, with QC run to ISO 9001-aligned procedures. Sampling runs 6 to 10 working days, or 12 to 15 for a complex build, and bulk runs 35 to 50 days, quoted FOB Xiamen on T/T 30% deposit and 70% before shipment.
To brief an outdoor range, write to service@junyuanbags.com or message the team on WhatsApp at +86 177 5002 0688. Trail and weather exposure is compared in the waterproof levels guide, the rain method referenced here is explained in the AATCC 35 rain test guide, closure options are set out in the waterproof ratings guide, and a range can be specified from the waterproof backpacks page.
Frequently Asked Questions
Q1: What makes an outdoor pack different from a day bag?
A: Duty. An adventure pack carries a heavy load for many hours over rough ground in bad weather, and it is opened by someone cold and tired. That produces three extra requirements: suspension that transfers load to the hips while wet, a closure that seals when operated badly, and abrasion resistance at specific zones.
Q2: How should pack volume be chosen for an outdoor range?
A: By trip length and its load rather than by filling gaps in a numeric ladder. A summit day needs a shell, water, food and a kit; a weekend adds a sleep system; a multi-day adds food for the longest leg. Sizing from the load produces volumes that suit real trips.
Q3: Why does a welded shell need different suspension?
A: Because it does not stretch, breathe or conform to its contents the way a textile shell does. The load moves as a mass rather than being damped, so load transfer has to come from geometry: a hip belt with real contact area, a back panel matched to a torso range, and load lifters that work.
Q4: Which closure suits an adventure pack?
A: A roll-top with a stiffener for a pack packed once and opened rarely, a zip collar for constant access on a climb or a shoot, and a lid with a collar where the load is overfilled. On a roll-top the stiffener length and stiffness matter more than the number of turns.
Q5: Where does an adventure pack wear out first?
A: At three zones rather than uniformly: the base, where it is set down on rock and grit; the hip belt, which rubs every step; and the external attach points, which are abraded by the pack's own hardware. Reinforcing those zones is far more efficient than specifying a uniform abrasion figure.
Q6: Does external carry compromise waterproofing?
A: It can. A welded webbing loop in the seam allowance or a bonded anchor costs nothing, while a stitched anchor puts needle holes through the waterproof layer. Compression straps cost nothing if anchored into a spine or seam allowance and rated for the pull direction, and cost everything if they are not.
Q7: How should a hydration tube pass through a waterproof pack?
A: Through a moulded port welded into the panel, or a baffled sleeve through the seam allowance, positioned high so it is never the lowest point when the pack is set down. Avoid a stitched hole with a pushed-in grommet, since the stitch line leaks around it. Test with the tube fitted.
Q8: What tests should an adventure pack pass before sampling closes?
A: A loaded march at rated weight with a wet shell, a spray or jet exposure to IEC 60529 with the pack loaded and the tube fitted, and a scuff cycle on the base and hip belt zones. The loaded march is the one most often skipped and the one that reveals anchor tear-out.
Q9: Where should weight be saved on an outdoor pack?
A: In the reinforcement map rather than in the shell. Reinforcing the base and attach points while leaving side panels at a lighter gauge produces a pack that is both lighter and more durable than one built at a uniform heavy gauge, because the weight moves to where it does work.
Q10: What has to change for cold and wet-glove operation?
A: Fastening size, grip texture and release force all have to be specified for a gloved hand, and the shell needs a low-temperature bend requirement. A film that stiffens in the cold makes a roll-top fold hard to form and then hard to keep formed, which is a closure failure at dusk.
Q11: How should 500 pieces be split across an outdoor size family?
A: Each size is a style and each colour is its own minimum, so a four-size, two-colourway range is eight commitments. The efficient first range is two sizes in one colourway, with a third added in season two once the sales split is known, sharing one shell and hardware family.
Q12: Why does season two come out slightly different from season one?
A: Because of ordinary preventable drift: a substitute roll, a re-set weld parameter, a closure from a different supplier, or a pattern revision nobody recorded. Each is defensible alone and collectively they produce a product the customer notices as different and returns.
Q13: How is season-two drift prevented?
A: Retain a sealed reference sample and compare every repeat against it, record weld parameters in the product file rather than on the machine, specify the closure supplier and re-test on any change, approve shade against the original swatch, and version-control the pattern with sign-off.
Q14: What capacity and documentation support an outdoor programme?
A: Capacity is verified by SGS at 4,950 square metres, 7 production lines, 149 pieces of equipment, 137 staff and 200,000 pieces per month. Documentation can cover CE, CPC, RoHS and REACH, with QC run to ISO 9001-aligned procedures, and lot acceptance is recorded to AQL 2.5 under ISO 2859-1.
People Also Ask
- What size waterproof pack do I need?
- Are roll-top backpacks better than zip?
- How waterproof is a hiking backpack?
- Can you attach gear to a waterproof pack?
- Do waterproof packs work in cold weather?
- How do you test a hiking pack?
- Why is my second order different from the first?