
Waterproof Bag Manufacturing: The 7-Line Process Guide
A waterproof bag is made in a fixed sequence of nine operations, and each one has a number attached to it that determines whether the finished bag holds water. The two that matter most are the RF weld, where dwell and pressure set the peel strength, and the seam tape, where the window and the temperature set whether the tape survives a season. QUANZHOU JUNYUAN BAGS runs this sequence across 7 production lines in an SGS-verified 4,950 square metre facility holding ISO 9001:2015, at 500 pcs per style per colour, 6-10 working days for sampling and 35-50 days for bulk from FOB Xiamen.
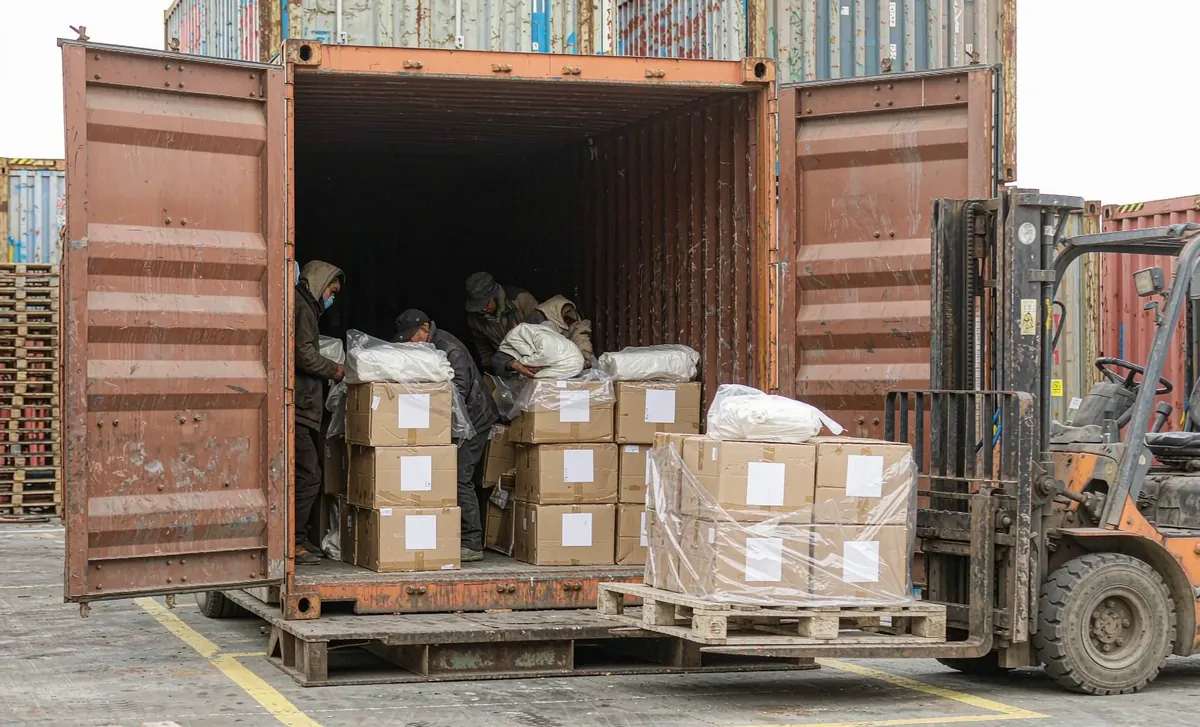
Table of Contents
- From Fabric Roll to Cut Work Order
- Die Cutting, Straight Knife and Laser Cutting Compared
- RF Welding: Dwell, Pressure and Cooling
- Ultrasonic and Hot-Air Welding on Seams and Tape
- Seam Taping: Width, Window and Temperature
- Weld and Tape Peel Strength Benchmarks
- Sewing: Stitch Density, Thread and Needle Selection
- Hardware Fitting and the Reinforcement Sequence
- In-Line Inspection and the AQL 2.5 Gate
- Air Pressure Leak Detection on Finished Bodies
- Packing, Carton Specification and Container Loading
- From Tech Pack to Approved Sample in 6 to 15 Days
- Scaling a Programme from Pilot to Repeat Order
- Frequently Asked Questions
- People Also Ask
From Fabric Roll to Cut Work Order
A waterproof bag programme starts with a fabric roll and a tolerance, and the tolerance is the part that gets ignored. A laminate is specified as a nominal weight and a nominal hydrostatic head, but a production lot varies in coating weight across the width of the roll and along its length, and the variance is what turns a passing weld into a failing one three rolls later. We therefore inspect the roll before it is cut rather than inspecting the finished bag and hoping.
Incoming inspection measures three things per roll: the coating weight, the hydrostatic head to ISO 811 on a sample taken from both edges and the centre, and the laminate bond strength. A roll is accepted only if all three fall inside the window, and a roll whose centre passes and whose edges do not is edge-trimmed rather than accepted, because the edge of a roll is where the coating weight drifts and where a weld placed at the edge will be weak. That is a material decision made before any cutting starts.
| Incoming check | Where it is sampled | Acceptance window | Action if it falls outside |
|---|---|---|---|
| Coating weight | Both edges and the centre of the roll | Within 5 percent of the specified value | Edge-trim or reject the roll |
| Hydrostatic head, ISO 811 | Three positions across the width | 10,000 mm minimum, 20,000 mm+ for heavy builds | Reject the roll for a waterproof programme |
| Laminate bond strength | Three positions across the width | Within the laminate supplier's stated window | Reject the roll, a weak bond welds badly |
| Face finish, AATCC 22 | One sample per lot | 90-100 spray rating when new | Re-finish or reject, the face sheds the first shower |
| Colour | A cutting from the roll against the approved standard | Within the agreed tolerance | Hold the lot for a shade banding decision |
Spreading follows, and it is more consequential than it looks. A waterproof laminate cannot be folded or creased during spreading, because a crease in a TPU laminate becomes a stress point that later shows as a crack at a fold. We spread face-up with the tension controlled, we relax the lay for four hours before cutting so the fabric recovers from the roll tension, and we cut a marker that places the largest panels in the centre of the width rather than at the edges. The grain direction matters too: a panel cut off-grain will stretch under load and take a seam with it.
The work order that comes out of this stage carries the three numbers the whole build depends on: the accepted coating weight, the accepted hydrostatic head and the grain direction for each panel. Those three go onto the traveller card that follows the batch down the line, so an operator at the welding station knows what the material in front of them actually is rather than what the spec sheet says it should be. Our manufacturing page shows the layout the seven lines are organised around.
Die Cutting, Straight Knife and Laser Cutting Compared
Cutting a coated or a laminated fabric is not the same as cutting an uncoated one, because the coating changes how the edge behaves. A thermoplastic coating can be welded and it can also be melted, and a cutting method that leaves a fused edge is doing the weld before the welding station gets to it. The three methods in use each leave a different edge, and the edge determines which downstream process is possible.
A straight knife cuts cleanly and it can cut many plies at once, which makes it the cheapest per piece, but it cannot hold a tight internal radius and it drags slightly on a coated face. A die press gives the most accurate and the most repeatable panel and it holds a radius, but the die is a tooling cost that has to be amortised, which makes it the right choice above a certain volume and the wrong one below it. A laser seals the edge as it cuts and it can hold any shape, but on a TPU laminate it produces a fused bead that has to be accounted for in the seam allowance.
- Straight knife: the lowest cost per piece, up to 40 plies, not suited to a tight internal radius or a coated face
- Die press: the most accurate and repeatable, a tooling cost amortised above roughly 1,000 pieces per panel
- Laser: any shape, a sealed edge, but a fused bead of 1-2 mm that must be allowed for in the seam allowance
- The seam allowance is fixed at 12 mm for a welded seam and 15 mm for a taped seam, regardless of the method
- Every cut panel is marked with its grain direction before it leaves the table, because a panel cut off-grain stretches later
The seam allowance figures in the fourth row are the ones that matter downstream and they are the reason the three methods are not interchangeable. A welded seam needs a clean 12 mm of uncoated-to-coated surface to make a bond, and a laser-cut edge that has fused 2 mm of that allowance reduces the effective weld width by about 17 percent. We allow for it by cutting the panel 2 mm larger when a laser is used, and we do not mix methods within one batch, because two different edge conditions arriving at the same welding station produce two different peel results.
One practical point about the die press that decides most of the economics in this stage. A die is worth its cost when the same panel is cut thousands of times, and it is a waste of money on a 500-piece first order where the design will change. We therefore cut the first order on a straight knife or a laser and we cut a die for the second, when the pattern has been approved and the panel geometry is frozen. That sequencing is the single largest avoidable tooling cost in a new programme, and it is a conversation we have with every client at the quotation stage.
RF Welding: Dwell, Pressure and Cooling
Radio-frequency welding is the operation that makes a genuinely waterproof bag, and it is a thermal process with three variables that have to be held together. The field heats the thermoplastic coating or laminate until it fuses, the pressure holds the two surfaces together while they fuse, and the cooling under pressure sets the bond. Get any one of the three wrong and the result is a seam that looks perfect and fails a peel test: too little heat gives a cold weld that peels, too much gives a burnt weld that is brittle, and releasing the pressure early gives a weld that looks fine and leaks under load.
We set the three parameters per material and per panel thickness rather than per machine, and we record them on the traveller card. Dwell is typically 2.5 to 6 seconds depending on the coating thickness and the area of the weld; pressure is set by the electrode area and it is held within a narrow band; and cooling under pressure is held for a minimum of 1.5 seconds before the jig opens. Those three are validated together on a first-off sample at the start of every shift and after every electrode change.
First-off validation at the welding station
- The electrode is cleaned and the generator is allowed to stabilise at the set power
- A first-off piece is welded on the actual production material for that batch, not on a standard coupon
- Three peel samples are cut from the first-off and pulled on a tensile machine at 100 mm per minute
- The three results are averaged and recorded against the minimum for that material and panel thickness
- If the average falls below the minimum the parameters are adjusted and the first-off is repeated, not averaged over
- The validated parameters are written on the traveller card and the card travels with the batch
The reason we validate on the production material rather than on a coupon is the coating weight variance described at the incoming stage. A weld validated on a coupon from the middle of a roll will be set for the best material in the batch, and a weld made at the end of the same roll with a lighter coating will then be under-heated and will peel. Validating on the material actually at the station removes that; it costs three samples at the start of a shift and it removes the most common cause of a weld failure in bulk.
Electrode design is the other half of it and it is where the geometry of the bag and the physics of the process meet. A flat-faced electrode makes a weld across its whole area, which is right for a straight seam and wrong for a corner, where the two layers of fabric are at an angle and the pressure will not be even. We use a profiled electrode for any corner or any three-dimensional junction, with the face shaped to the angle of the join, and we hold a weld width of 12 mm minimum on a structural seam and 8 mm on a non-structural one. A narrower weld will pass a peel test and still leak at the edge.
Ultrasonic and Hot-Air Welding on Seams and Tape
RF welding needs a thermoplastic that responds to the field, and it needs a flat or a profiled electrode that can reach the join. Two common cases fall outside that: a long, continuous seam on a light fabric, and the application of a seam tape. Ultrasonic welding and hot-air welding cover those, and they are the two processes that follow the RF station on most of the lines.
Ultrasonic welding passes vibration into the material and generates the heat at the interface, which makes it fast and makes it suitable for a long continuous seam on a 210D or 420D laminate. It does not suit a heavy 840D or 1000D fabric, because the energy required to fuse a thick coating at the interface is high enough to damage the face. Hot-air welding introduces heated air at the interface and then presses it, which is slower and which is the process used for a long seam on a heavy fabric and for the application of a seam tape.
| Process | Best on | Weld or bond width | Limitation |
|---|---|---|---|
| RF welding | A structural seam or a three-dimensional junction, 420D to 840D | 12 mm structural, 8 mm non-structural | Needs a thermoplastic and an electrode that can reach the join |
| Ultrasonic welding | A long continuous seam on 210D to 420D laminate | 6-10 mm | Too aggressive for a heavy fabric, damages the face |
| Hot-air welding | A long seam on 840D or 1000D, and seam tape application | Tape width, 20-25 mm | Slower, and sensitive to air temperature drift |
| Hot wedge | A straight long seam on a heavy PVC scrim | 20-25 mm | Straight lines only, no three-dimensional junctions |
| Hot-air tape machine | Seam tape over a sewn seam | 20-25 mm tape | Requires a flat surface under the seam to press against |
The hot-air tape machine in the last row is the one that turns a sewn bag into a waterproof one, and it is the most widely used process on the lines because most bags are part-sewn. It requires a flat surface under the seam to press against, which is a design constraint rather than a process one: a seam placed in a position where the tape machine cannot get a platen behind it cannot be taped, and it has to be welded or placed elsewhere. We flag that at the pattern stage, because it is a two-minute conversation at the drawing and a two-week problem at the line.
The temperature on a hot-air machine drifts, and the drift is the thing that produces a tape that looks applied and is not bonded. We hold the air temperature within plus or minus 5 degrees C of the set point, we log it twice per shift, and we pull a peel sample from the taped seam at the same two points in the shift. A machine that has drifted 15 degrees C will still produce a tape that sits flat on the seam and it will peel off in the field, which is the single most common cause of a bag that passed its inspection and leaks for the customer.
Seam Taping: Width, Window and Temperature
A seam tape is a strip of thermoplastic adhesive with a fabric backing, applied over a sewn seam under heat and pressure. Three numbers determine whether it works: the tape width, the temperature window of the adhesive, and the pressure applied during application. The three interact, and the interaction is why a tape that is perfectly specified can still fail if the machine is set for a different one.
Tape width is set by the seam underneath and by what the tape has to span. A 20 mm tape over a single-needle seam gives roughly 6 mm of bonded margin on each side, which is enough for a shower-resistant bag and not enough for one that will be immersed. We use a 25 mm tape on any seam in a bag built to IPX7 or IPX8, and a 22 mm tape where the geometry will not take 25 mm. The adhesive has a temperature window, typically 15 to 20 degrees C wide, and it has to be applied inside that window at both its faces: too cool and it does not flow into the fabric, too hot and it flows through and starves the bond.
- Tape width 20 mm for a shower-resistant build, 22 mm where the geometry requires it, 25 mm for IPX7 or IPX8
- Adhesive applied inside its stated temperature window, typically a 15 to 20 degree C band, at both faces
- Air temperature on the machine held within plus or minus 5 degrees C of the set point, logged twice per shift
- Pressure applied by a roller of the specified durometer, because a hard roller bridges and a soft one does not press
- A peel sample pulled from the taped seam twice per shift, at the same points the temperature is logged
The roller durometer in the fourth row is a specific and under-appreciated variable. A roller that is too hard will bridge over the raised ridge of the seam underneath and it will leave two unbonded strips either side of the needle line, which is exactly where a taped seam leaks. A roller that is too soft will press properly and will also deform, which shortens its life and produces an inconsistent bond along the length. We specify the durometer per tape and per seam construction and we replace the rollers on a schedule rather than when they visibly fail.
There is one requirement on the seam underneath the tape that is a sewing decision and not a taping one. The needle hole row has to be narrow enough for the tape to span it and the thread has to be a bonded polyester so it does not wick. We hold 7 to 9 stitches per 25 mm and a bonded thread, and we will not tape over a seam sewn with an untreated thread, because the thread will carry water along the seam under the tape and the tape will do nothing. That is a case where the sewing station determines whether the taping station can succeed.
Weld and Tape Peel Strength Benchmarks
Every weld and every taped seam we make is held to a peel strength number, and that number is the only thing that separates a seam that looks right from one that holds. We pull three samples per first-off from the production material and three per shift from the line, at 100 mm per minute on a tensile machine, and we record the average and the lowest of the three. The lowest matters as much as the average, because a seam that averages well and has one weak result is a seam with a weak spot.
| Joint type | Material | Minimum average peel | Minimum single result | Failure mode we look for |
|---|---|---|---|---|
| RF weld, straight seam | 500D TPU laminate | 45 N per 25 mm | 38 N per 25 mm | A clean peel at the interface means under-heated |
| RF weld, straight seam | 840D TPU laminate | 55 N per 25 mm | 47 N per 25 mm | A tear in the fabric beside the weld means correct |
| RF weld, corner junction | 600D TPU laminate | 40 N per 25 mm | 34 N per 25 mm | A peel at the corner means the electrode was not profiled |
| Ultrasonic seam | 420D TPU laminate | 32 N per 25 mm | 27 N per 25 mm | Face damage means the energy was too high |
| Hot-air welded seam | 840D TPU laminate | 48 N per 25 mm | 41 N per 25 mm | A peel with adhesive on one side only means under-temperature |
| Taped seam, 25 mm tape | 600D laminate over a sewn seam | 35 N per 25 mm | 30 N per 25 mm | Two clean strips either side of the needle line means the roller bridged |
The failure mode column is the useful part of that table and it is what the operator at the station is trained to look for, because the number tells you that something is wrong and the failure mode tells you what. A clean peel at the interface with no material transfer means the weld was under-heated; a tear in the fabric beside the weld means the weld was correct and is stronger than the material. A taped seam that peels in two clean strips either side of the needle line means the roller bridged the seam ridge, which is a pressure problem and not a temperature one.
We also hold a fabric-tear result and not only a peel result, because a weld that is stronger than the fabric is the right target and a weld that is weaker is a leak waiting to happen. A correct weld on a TPU laminate will tear the fabric beside it before the weld itself separates, and that is the result we train the station to aim for. If a weld peels cleanly at the interface at 60 N under load, it is a weld that will peel at 20 N in the field after a season of UV and flexing, and the peel test alone will not catch that if nobody records how it failed.
Sewing: Stitch Density, Thread and Needle Selection
Sewing remains the largest operation on a waterproof bag line, because most bags are part-sewn even when their critical seams are welded. Three variables determine whether a sewn seam helps or hurts: the stitch density, the thread and the needle. The three have to be chosen together, and choosing them individually is what produces a seam that is tight, strong and leaky.
A higher stitch density looks better and it is usually worse, because every stitch is a hole. We hold 7 to 9 stitches per 25 mm on a structural seam and 6 to 8 on a light one, and we treat any request for a denser stitch on a waterproof panel as a specification to be corrected rather than met. The thread is a bonded polyester in a ticket size matched to the fabric weight, chosen for low wick, and the needle is a ballpoint of the smallest gauge that will carry the thread without deflection, because a larger hole leaks more.
- 7 to 9 stitches per 25 mm on a structural seam, 6 to 8 on a light one; a denser stitch is more holes and more leak paths
- A bonded polyester thread, low wick, ticket size matched to the fabric weight, never an untreated thread on a waterproof panel
- A ballpoint needle of the smallest gauge that carries the thread without deflecting, which is typically a 90 or a 100
- The seam allowance on a taped seam is 15 mm, so the tape has a full bonded margin either side of the needle line
- A needle change on a schedule rather than on failure, because a burred needle cuts the yarn and makes a larger hole
The needle schedule in the last row is worth explaining, because it is a cost-saving that costs more. A needle that is still sharp enough to sew is often already burred enough to cut the yarn as it passes, and a cut yarn produces a small defect at every stitch that later becomes a leak path and a wear point. We change needles on a count of pieces rather than on a visible failure, and the count is set per fabric. It costs a needle and it removes a defect class that is otherwise invisible until the bag is used.
One construction rule governs where sewing is allowed at all. A sewn seam is permitted on any panel that will not be immersed and whose reverse will be taped or protected, and it is not permitted on the external wall of a compartment built to IPX7 or IPX8. That rule is on the pattern and not on the line, because it determines the geometry: a bag built to IPX7 has to be designed so its external walls can be welded, which means fewer external pockets, a simpler shape and a different approach to the junctions. We tell a client that at the tech-pack stage rather than after the first sample.
Hardware Fitting and the Reinforcement Sequence
Hardware is fitted at a defined point in the sequence and not at the end, and the position is a deliberate one. A buckle, a clip or a D-ring that is fitted after the body is closed can only be attached to the outer face, and a fitting attached to the outer face loads the shell fabric rather than the structure. We fit the hardware to the reinforcement before that reinforcement is closed into the seam, so the load path carries into the panel and into the seam allowance rather than into the face of the finished bag.
The sequence is: the reinforcement patch is cut and positioned, the webbing loop is bar-tacked to the patch, the patch and the loop are sewn into the panel assembly, the panel is closed, and then the hardware is clipped onto the loop. That ordering means the webbing can be carried 80 mm or more into the panel, which is the single requirement that stops a lash point or a tie-down tearing out. Fitting the hardware after the body is closed makes that impossible.
| Fitting | Reinforcement | Carry into the panel | Load rating we build to |
|---|---|---|---|
| Lash or tie-down loop | A patch of the body material, 60 x 80 mm | 80 mm minimum, bar-tacked | 250 N in any direction |
| Shoulder strap anchor | A patch plus a bar-tack into the seam allowance | Into the seam allowance, not the face | 350 N, the highest on the bag |
| Handle | A patch carried 100-120 mm into the body | 100 mm minimum, bar-tacked | 250 N for a full lift |
| D-ring or a clip point | A 25 mm webbing loop on a 50 x 50 mm patch | 60 mm minimum | 150 N |
| Drain grommet | A 60 mm diameter patch of the body material | Set into the patch, not the single layer | A pull-out resistance, tested before release |
The bar-tack pattern matters as much as the reinforcement, and it is the one thing we check on every first-off. A single bar-tack across the webbing concentrates the load on one line and it will tear the webbing at that line; a cross-box or a double-tack pattern spreads it and it fails by tearing the fabric instead, which takes far more force. We specify the pattern on the tech pack, and we require the machine to be set for it rather than relying on the operator to choose.
Rivets are used only where a brief requires them and where they can be backed, and the reason is the same as the reason we exclude plated metal from a marine product: a rivet is a hole, and a plated rivet is a hole that corrodes. Where a rivet is required we use a 316 stainless or an aluminium rivet with a backing washer, and we place it on a reinforced panel rather than on the outer shell. A rivet placed directly in a waterproof wall is a leak path that no amount of sealant reliably closes over a product's life.
In-Line Inspection and the AQL 2.5 Gate
Inspection on a waterproof bag line happens at three points and the final one is the least useful of them. A final inspection tells you what has already gone wrong across a whole batch. An in-line inspection at the welding and taping stations catches it while the parameters can still be corrected, and a first-off check catches it before a single piece of the batch has been made. We therefore put most of the inspection effort at the two early points and treat the final gate as a confirmation.
The final gate is set to AQL 2.5 under ISO 2859-1, which fixes the sample size and the acceptance number for a given batch size, and it is applied to a defined defect classification. A critical defect on a waterproof bag is one that lets water in or that makes the bag unusable; a major defect is one the customer will notice and complain about; a minor defect is one they will notice and not complain about. The classification is agreed with the client before production and it is what the AQL number is applied to.
- Critical: a weld or a tape that fails the peel minimum, a closure that fails a water test, a missing reinforcement
- Major: a visible weld mark, a misaligned panel, a skipped stitch, a hardware item that does not operate
- Minor: a thread end, a slight shade variation within tolerance, a print registration within tolerance
- First-off and in-line checks at the welding and taping stations catch the critical class before it reaches the gate
- The final gate confirms the result on an AQL 2.5 sample and it is a confirmation, not the primary control
A client can tighten the level for critical defects to 1.5, and we recommend it on any programme with a high unit value or a genuine immersion requirement. The reason is arithmetic: at AQL 2.5 on a 3,000-piece batch, the sample is 125 pieces with 7 critical defects permitted before the lot is rejected, and 7 bags in 3,000 that let water in is a rate that a brand selling a premium product will not accept. At 1.5 the sample is the same and the permitted number is 5, which does not sound like much of a difference until you multiply it by the number of lots in a year.
Water testing at the gate is a sample test and not a hundred-percent one, and it is worth being explicit about that because buyers assume otherwise. A 30-minute immersion test cannot be run on every piece of a 3,000-piece batch. We run the ingress test on 3 pieces per lot at the IPX level the product is built to, we run the spray test to AATCC 22 on a further 3, and we run a peel test on 3. The hundred-percent operation is the air pressure check described next, and that is the one that catches the individual unit that would otherwise reach the customer.
Air Pressure Leak Detection on Finished Bodies
Air pressure testing is the one hundred-percent water-integrity check we run, and it is the operation that most separates a waterproof bag line from a general one. A sealed body is inflated to a low pressure through a port, held for a fixed time, and the decay in pressure is measured. A body that holds its pressure is airtight and therefore watertight at that pressure; a body that decays has a leak, and the rate of decay tells an operator roughly how large it is. It takes 20 to 30 seconds and it catches the individual unit that a sample test will always miss.
The pressure is deliberately low. An inflated bag at a high pressure will find its own weaknesses and burst a good seam, so we hold 2.5 to 4 kPa depending on the volume of the body, and we hold the body in a jig that limits its expansion so it is measuring a leak and not a deformation. The decay limit is set per product, and a body that decays faster than the limit is marked, patched if the leak can be located and re-tested, and scrapped if it cannot be repaired to the same standard.
The hundred-percent sequence on the line
- The finished body is placed in a jig that limits its expansion, and every closure is set to its fully closed position
- The body is inflated through a port to 2.5-4 kPa, depending on its volume
- The pressure is held for 15 seconds and the decay is recorded in pascals
- A body holding its pressure within the product limit passes and moves to the final assembly
- A body exceeding the decay limit is marked, and the leak is located by a localised soap-film or a listening method
- A located leak on a welded seam is re-welded and the body is re-tested; a leak that cannot be located is scrapped
The jig in the first step is what makes the test meaningful and it is the part that is usually omitted. A body inflated without a jig will expand, and the expansion itself will cause a pressure drop that is indistinguishable from a small leak, which means an operator will either pass a leaking bag or reject a good one. The jig also lets us test at a higher pressure than we could otherwise, because it prevents the deformation that a high pressure would cause. We build a jig per product family and we treat it as tooling rather than as a fixture.
There is a limitation to the method that we state plainly to every client, because it is the reason the sample immersion test still exists. An air test at 2.5 kPa detects a leak path that will let water in under a low hydrostatic pressure, and it does not simulate 30 minutes at one metre. It is a hundred-percent screen for gross defects and it is very good at that; the IPX7 claim is still established by the sample immersion test under IEC 60529 and by the spray and shower results to AATCC 22 and AATCC 35. The two are complementary and we report them separately.
Packing, Carton Specification and Container Loading
Packing is the last manufacturing operation and it is where a surprising amount of damage happens, because a welded or a taped seam that survived production can be creased and cracked in a carton. A TPU laminate folded tightly for six weeks in a container will take a crease, and a crease at a weld is a crack. We therefore specify packing as a manufacturing step with its own parameters rather than as a warehouse activity.
The three parameters are the fold method, the carton strength and the container loading pattern. We fold a welded bag loosely rather than tightly, we never fold it at a welded seam where the geometry allows, and we pack it with the closure open so the bag is not held in a strained position. Cartons are specified by burst strength and by edge-crush, and each is drop-tested with a full load before a carton specification is approved. The loading pattern is planned so the cartons are not the structural element of the stack.
- A welded bag is folded loosely and never folded across a welded seam where the geometry allows it
- Every closure is packed open and every strap is packed slack, so nothing is held in a strained position for weeks
- Cartons specified by burst strength and edge-crush, and drop-tested with a full load before approval
- A desiccant sachet in every carton on a programme shipping to a humid market, and a humidity indicator card in the master carton
- The container loading pattern planned in advance, so the cartons carry their own stack load and nothing else
The desiccant sachet in the fourth row prevents the complaint that most often arrives with a new brand's first container. A bag packed slightly damp in a sealed container will develop mildew in transit, and it will arrive smelling and, in a bad case, spotted. A 10 g sachet per carton and an indicator card in the master carton costs very little, and it lets a receiving warehouse see at a glance whether a container has taken water in transit. We include it on every programme shipping to a tropical or a humid market without being asked.
Container utilisation is the commercial side of the same stage and it affects the landed cost more than most people expect. A roll-top dry bag nests and packs efficiently, a structured backpack with a moulded panel does not, and the difference can be 30 percent of the container. We calculate the pack per container during the quotation rather than after it, because a product that packs badly has a higher landed cost per piece and a brand discovering that after the first order has already committed will not be pleased. The figures go on the quotation as pieces per 40-foot high-cube container.
From Tech Pack to Approved Sample in 6 to 15 Days
Sampling is the stage where a programme is won or lost, and its duration is determined by how much of it is new. A bag built on an existing pattern and an existing material set, with a new logo and a new colour, takes 6-10 working days. A bag that needs a new pattern, a new weld electrode or a moulded component takes 12-15 working days, and the extra time is tooling time rather than waiting time. We state which of the two a brief is at the quotation stage, because a client planning for the shorter one and getting the longer one will rightly be unhappy.
The sequence within the sampling window is fixed. Day one is the pattern and the specification review, where the three waterproof numbers are agreed as numbers rather than as words. Then the marker and the cutting, then the welding or the taping, then the assembly, then the testing. The prototype is not released until its peel, spray and hydrostatic results are recorded, because a sample sent without its data will be approved on appearance and then disputed when the bulk numbers differ.
- Day 1: the tech pack is reviewed and the shell, the IPX target and the seam method are agreed as numbers
- Days 1-2: the marker is made, the material is issued, and any new electrode or mould is commissioned
- Days 2-5: cutting, welding or taping, and assembly, on the production tool where the volume justifies it
- Days 5-7: peel testing, hydrostatic head to ISO 811, spray to AATCC 22, and the air pressure check
- Days 7-9: any revision, and a second build if the results require it, then the sample is packed and sent
- Complex builds add 3-5 working days for a moulded component, a custom closure or a new weld tool
The most common thing that consumes a second sampling round is a specification that was agreed as a word. A brief that says the bag should be waterproof and strong will produce a sample the client rejects for reasons neither party can act on, and a brief that says 10,000 mm hydrostatic head, IPX6 at the closure and a 45 N per 25 mm peel minimum will produce a sample that can be measured and either approved or corrected. We ask for the three numbers at the start and we will not begin a pattern without them.
We also recommend one thing that clients resist and that saves the most time: approve the sample on the data and not only on the object. A sample can look perfect and still be built on a weld that will not hold in bulk, and the peel result on the traveller card is the thing that predicts the bulk. Our quality page sets out the test reports that go out with every sample, and the ingress test methods page documents how each result is produced.
Scaling a Programme from Pilot to Repeat Order
The second order is where a programme becomes economic, and it is where the tooling and the data from the first one pay off. A repeat order runs from a stored pattern, a validated weld electrode and a recorded parameter set on the traveller card, which means the first-off validation is a confirmation rather than a development. That is why a repeat order typically runs in a shorter 30-40 day window against the 35-50 days of a first bulk, and it is why the first order should be treated as an investment in the second.
Three things are retained between orders and they are the three that determine the repeat economics. The pattern, in its approved revision; the weld electrode and the parameters validated against it; and the material lot reference, including the accepted coating weight and the hydrostatic head of the roll the approved sample came from. Retaining the third is what prevents the most common complaint about a second order, which is that the bags are slightly different from the first ones. They are different because the material was different, and the way to stop that is to record the material as carefully as the pattern.
- The approved pattern revision, stored and referenced on every subsequent work order
- The weld electrode and its validated parameters, recorded on the traveller card and re-validated on the first-off
- The material lot reference, including the accepted coating weight and the hydrostatic head of the approved roll
- The defect classification agreed with the client, so the AQL 2.5 gate means the same thing on every order
- The packing and carton specification, so the second order arrives in the same condition as the first
The capacity behind this is SGS-verified and it is worth stating in full, because it is the basis of any delivery commitment we make. Our validated production partner facility covers 4,950 square metres with 7 production lines, 149 machines, 137 staff and a monthly capacity of 200,000 pieces. QC runs to ISO 9001-aligned procedures and a BSCI audit can be hosted, with product compliance covering CE, CPC, RoHS and REACH and material testing supported by SGS. QUANZHOU JUNYUAN BAGS has run sewn and welded bag programmes since 2014 and our founder has worked in the industry since 2004.
The commercial envelope is the same for a first order and a repeat. Minimum order is 500 pcs per style per colour, sampling is 6-10 working days or 12-15 for a complex build, bulk is 35-50 days from sample approval and 30-40 on a repeat, inspection is to AQL 2.5 under ISO 2859-1, and the trade terms are FOB Xiamen with T/T 30 percent deposit and 70 percent before shipment. Write to service@junyuanbags.com or message WhatsApp +86 177 5002 0688, or start from our custom development page.
Frequently Asked Questions
Q1: What makes a sewn seam leak?
A: Every stitch is a hole, and a denser stitch is more holes and more leak paths. We hold 7 to 9 stitches per 25 mm on a structural seam and we use a bonded, low-wick polyester thread, because an untreated thread carries water along the seam under the tape and the tape then does nothing. The needle matters too: a burred needle cuts the yarn and makes a larger hole.
Q2: What peel strength should a welded seam hold?
A: A straight RF weld on a 500D TPU laminate is held to a minimum average of 45 N per 25 mm with no single result under 38 N, and an 840D laminate to 55 N average. A weld that is correct tears the fabric beside it before the weld separates, and that tear result is what we train the station to aim for rather than the number alone.
Q3: Why is RF welding validated on production material?
A: Because the coating weight varies across a roll and along its length, and a weld validated on a coupon from the middle of a roll is set for the best material in the batch. A weld made at the end of the same roll with a lighter coating will then be under-heated and will peel. Validating on the material at the station costs three samples per shift and removes the most common weld failure in bulk.
Q4: What is the difference between welding and taping a seam?
A: A weld fuses the two surfaces directly and needs no adhesive, which makes it the stronger and the more durable joint and the one used on any external wall built to IPX7 or IPX8. A tape is a strip of thermoplastic adhesive applied over a sewn seam under heat and pressure, and it is used where the geometry prevents an electrode from reaching the join. The two are reported separately.
Q5: How do you test every bag for leaks?
A: By a hundred-percent air pressure check. The finished body is placed in a jig that limits its expansion, inflated to 2.5-4 kPa, held for 15 seconds, and the decay is recorded. A body exceeding the product's decay limit is marked, the leak is located and re-welded, and the body is re-tested. A leak that cannot be located is scrapped.
Q6: Is an air pressure test the same as an IPX7 test?
A: No, and we report them separately. The air test at 2.5 kPa is a hundred-percent screen for gross defects and it is very good at that. The IPX7 claim is established by a sample immersion test under IEC 60529, with spray to AATCC 22 and shower to AATCC 35, because 30 minutes at one metre cannot be simulated by a low-pressure air check.
Q7: What AQL level do you inspect to?
A: AQL 2.5 under ISO 2859-1 as standard, applied to a defect classification agreed with the client before production. A critical defect on a waterproof bag is one that lets water in or makes the bag unusable, a major defect is one the customer will notice and complain about, and a minor defect is one they will notice and not complain about.
Q8: Why should the AQL level be tightened to 1.5?
A: Because of the arithmetic. At AQL 2.5 on a 3,000-piece batch the sample is 125 pieces with 7 critical defects permitted, and 7 bags in 3,000 that let water in is a rate a premium brand will not accept. At 1.5 the sample is the same and the permitted number is 5, which matters when it is multiplied across a year of lots.
Q9: How is hardware attached so it does not tear out?
A: The webbing loop is bar-tacked to a reinforcement patch before that patch is closed into the panel, so the loop carries at least 80 mm into the panel and the load goes into the structure rather than into the face. The hardware is clipped onto the loop afterwards. Fitting hardware to the finished outer face loads the shell fabric, which is how a lash point tears out.
Q10: Why is packing a manufacturing operation?
A: Because a welded or a taped seam that survived production can be creased and cracked in a carton, and a TPU laminate folded tightly for six weeks in a container will take a crease. We fold loosely, never across a welded seam where the geometry allows, pack every closure open and every strap slack, and drop-test the carton with a full load before the specification is approved.
Q11: How long does sampling take?
A: 6-10 working days for a bag on an existing pattern and material set, and 12-15 working days where a new pattern, a new weld electrode or a moulded component is needed. The extra time is tooling time rather than waiting time, and we state which applies at the quotation stage. The prototype is not released until its peel, spray and hydrostatic results are recorded.
Q12: What is the bulk production lead time?
A: Bulk production takes 35-50 days from sample approval, and a repeat order against a stored pattern, a retained electrode and a recorded parameter set typically runs in a shorter 30-40 day window. The difference is the first-off validation: on a repeat it is a confirmation rather than a development. All shipments move on FOB Xiamen with T/T 30 percent deposit and 70 percent before shipment.
Q13: What are the commercial terms for a production programme?
A: Minimum order is 500 pcs per style per colour. Sampling is 6-10 working days, or 12-15 for a complex build. Bulk is 35-50 days from sample approval. Inspection is to AQL 2.5 under ISO 2859-1. The trade terms are FOB Xiamen with T/T 30 percent deposit and 70 percent before shipment. Tooling is retained between orders so a repeat does not pay for it twice.
Q14: What capacity is behind a delivery commitment?
A: An SGS-verified 4,950 square metre facility with 7 production lines, 149 machines, 137 staff and a monthly capacity of 200,000 pieces, holding ISO 9001:2015 and audited to BSCI. Product compliance covers CE, CPC, RoHS and REACH with material testing supported by SGS. QUANZHOU JUNYUAN BAGS has run sewn and welded programmes since 2014, and our founder has worked in the industry since 2004.
People Also Ask
- How are waterproof bags made?
- What is RF welding in bag manufacturing?
- How strong is a welded seam?
- How do factories test bags for leaks?
- What is AQL 2.5 in bag inspection?
- How long does it take to make a waterproof bag?